Wednesday, January 23, 2013

Tutorial


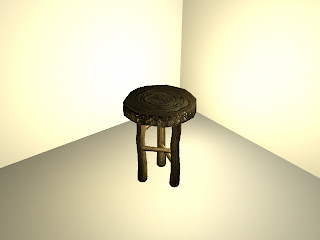
This is not exactly like the tutorial because she used an actual photo of wood while I had to create my own. I  need to play with the displacement maps a bit more because this only has a bump map on this version. I understand that the lighting isn't cool either but I just wanted the object to be visible. I found that the mapping was relatively easy and I had a photoshop texture map in no time. I found that making a wood texture in photoshop is awful and difficult when you haven't used photoshop in over a year.  I had some issues with the quality of the photoshop files and the quality of the textures but I will make sure that the quality is higher next time. I might just redo this tutorial with actual photographs to see if that makes any difference. http://www.joyoge.com/listing/how-to-make-old-tree-textures-in-photoshop-tutorials
These are the tutorials that I followed.


So these are the textures that I made in Photoshop that I will apply to my model. The tutorial was extremely helpful until it ended at the texture at the very bottom. I had to create a bark like texture more the side of the top of the stool and a circular texture for the very top of the stool's seat. I took the bottom texture and experimented until I got something I liked which resulted with the bark texture and the circular texture. Right now I am working on applying the textures to my model and adding a specular map and a displacement map. I am having issues on getting the side texture (the bark texture) not to stretch too much when I apply it to my model. I will then have to create the specular map and the displacement map and then I should be done. Photoshop is a pain and wood textures are not my friends. TRAVIS APPROVED.